2.6 Add a new user
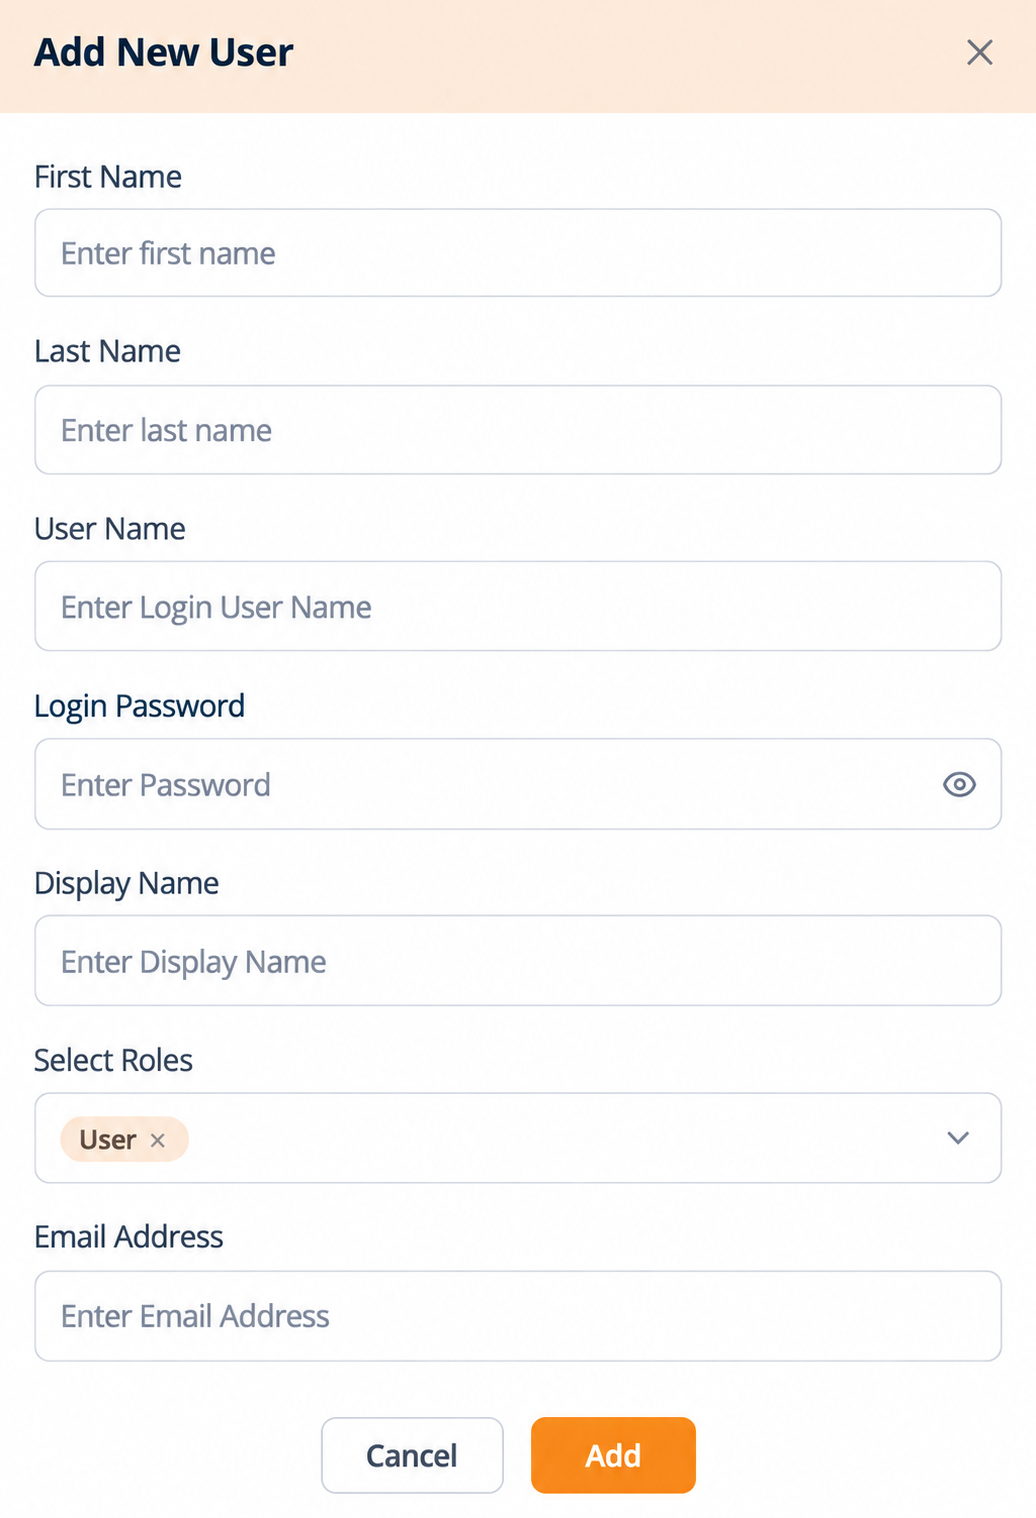
Selecting Add New Usuario at the top right of the Usuarios list opens a modal titled Add New Usuario.
Complete the form:
| Campo | What to enter |
|---|---|
| First Nombre | The user's first name. |
| Last Nombre | The user's last name. |
| Usuario Nombre | The unique login identifier this user will sign in with. It cannot be changed afterwards, so agree to a convention before you start creating accounts. |
| Login Contraseña | The initial password for the account. Seleccione the eye icon to reveal the characters and confirm what you typed. |
| Display Nombre | The name shown for this user across the platform, including in the account menu and the Usuarios list. |
| Seleccione Roles | The role or roles for this user. See below. |
| Email Address | The user's email address, used for credentials and notifications. |
Seleccione Roles. The dropdown offers exactly two options, Inquilino Admin and Usuario. The field arrives pre-filled with Usuario, so a role is already applied before you touch it. Selected roles appear as tags inside the field. Seleccione the dropdown to add a role, and select the x on a tag to remove that role. More than one role can be assigned to the same user.
The dropdown also renders a blank, highlighted, selectable option above Inquilino Admin and Usuario. It is not a role. Ignore it and select one of the two named options.
Save or discard -
- Seleccione Add to create the account.
- Seleccione Cancelar to close the modal without creating the user.
- Seleccione the X at the top right of the modal to close it without saving.
How this form validates. No field on this form is marked as required, and Add is clickable on a completely empty form. Nothing is checked as you type and nothing is greyed out to stop you. Validation runs only after you select Add. Two practical consequences:
- Fill in all seven fields before selecting Add. Do not treat a clickable Add as confirmation that the form is complete.
- The Email Address field is an email-type input, so the browser applies its own format check on that one field, for example rejecting a value with no @. That check is the browser's, not the product's.
After the account exists, complete two more steps before the user can make calls: map them to telephony and unlock PBX and voice access (see 2.11).
Figure key, Add New Usuario modal
- Modal title, Add New Usuario.
- X close control, top right of the modal.
- First Nombre field.
- Last Nombre field.
- Usuario Nombre field.
- Login Contraseña field, with the eye icon that reveals the characters.
- Display Nombre field.
- Seleccione Roles field, pre-filled with the Usuario tag, with the x on the tag and the dropdown arrow.
- Email Address field.
- Cancelar button.
- **Botón Añadir.