INS 4.2 Upload and analyse recordings
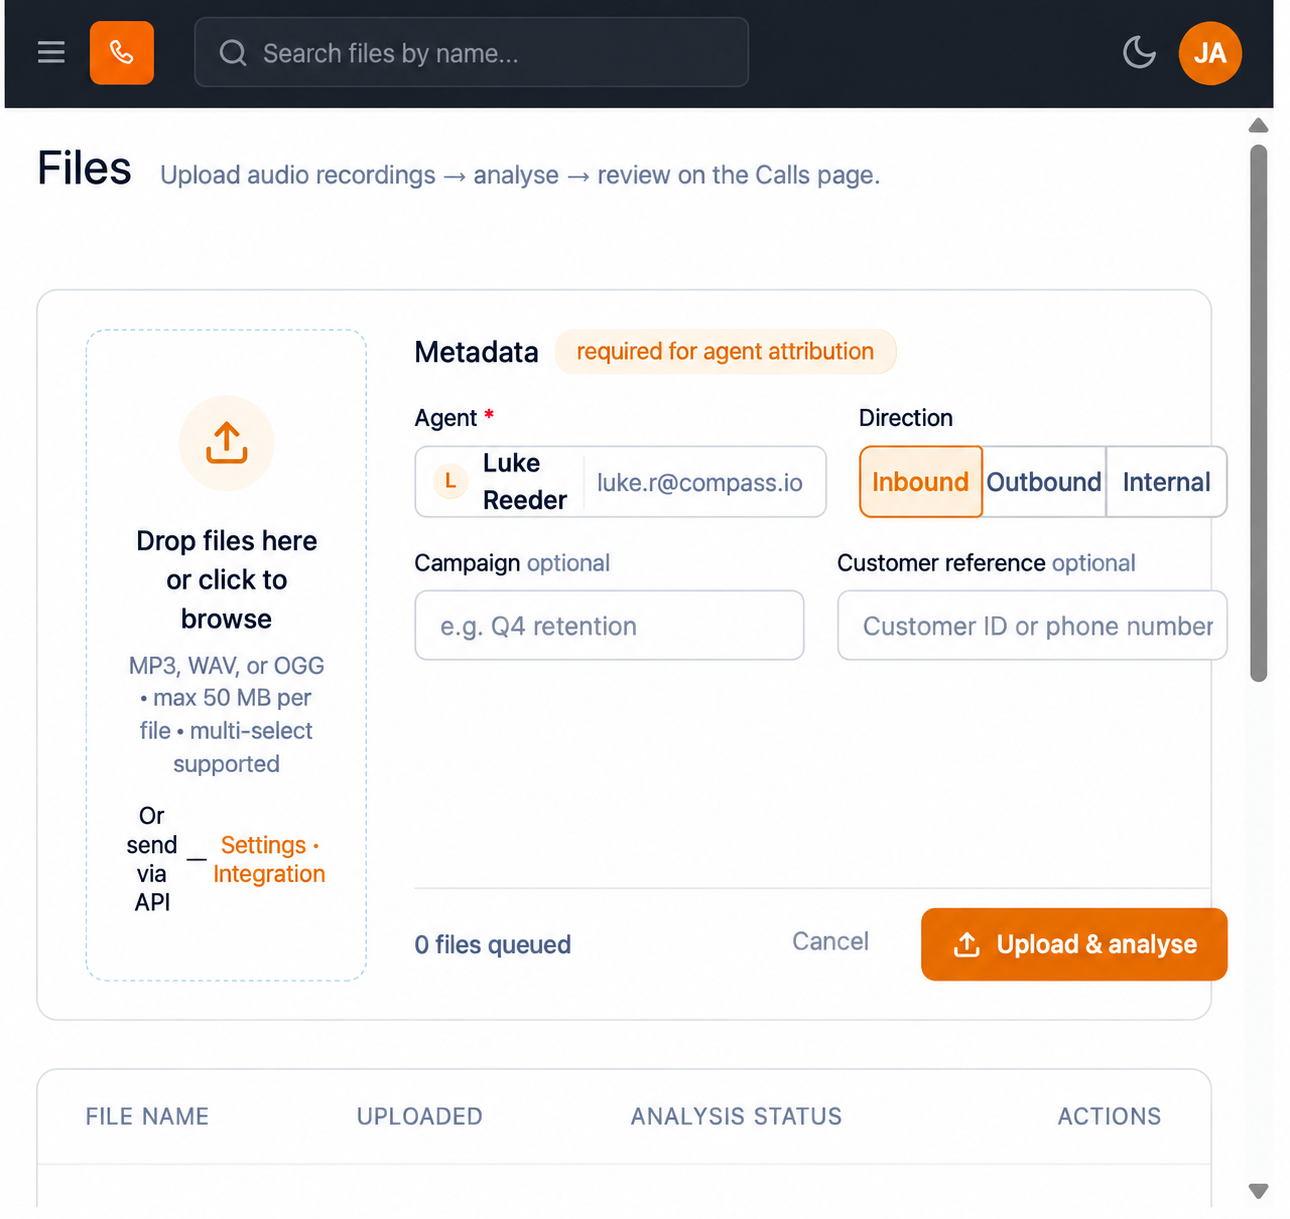
The metadata block is headed Metadata, with the note "required for agent attribution".
- Seleccione Archivos.
- Drop the recordings into the upload area, or select the area to browse for files.
- Confirmar every queued file is MP3, WAV or OGG and no larger than 50 MB.
- In Agente, marked mandatory with an asterisk, select the agent responsible for the call. The picker lists each agent by name and email address.
- Set Direction: Inbound, Outbound or Internal.
- Optionally enter a Campaña value.
- Optionally enter a Customer reference, for example an approved customer ID.
- Check the queued-file count.
- Seleccione Upload & analyse.
- Watch Analysis Estado in the files table, then read the completed result on Llamada.
Always set Agente. An upload without it becomes an unassigned call: it is analysed, but it is attributed to nobody, so it is missing from agent leaderboards and per-agent insights. Unassigned calls then have to be reconciled by hand (see INS 5.2). Setting Agente at upload is the single habit that keeps agent analytics trustworthy.
Set Direction honestly. Inbound and outbound calls are judged differently by the analysis, and mislabelling them distorts every aggregate that follows.
Figure key, Archivos
- Insights left navigation, with Archivos selected.
- Upload area, accepting MP3, WAV and OGG up to 50 MB.
- Agente selector.
- Direction selector: Inbound, Outbound, Internal.
- Campaña field.
- Customer reference field.
- Queued-file count.
- Cancelar control.
- Upload & analyse button.
- Archivos table, with the columns FILE NAME, UPLOADED, ANALYSIS STATUS and ACTIONS. Its empty state reads "No files uploaded yet. Upload your first recording using the panel above."