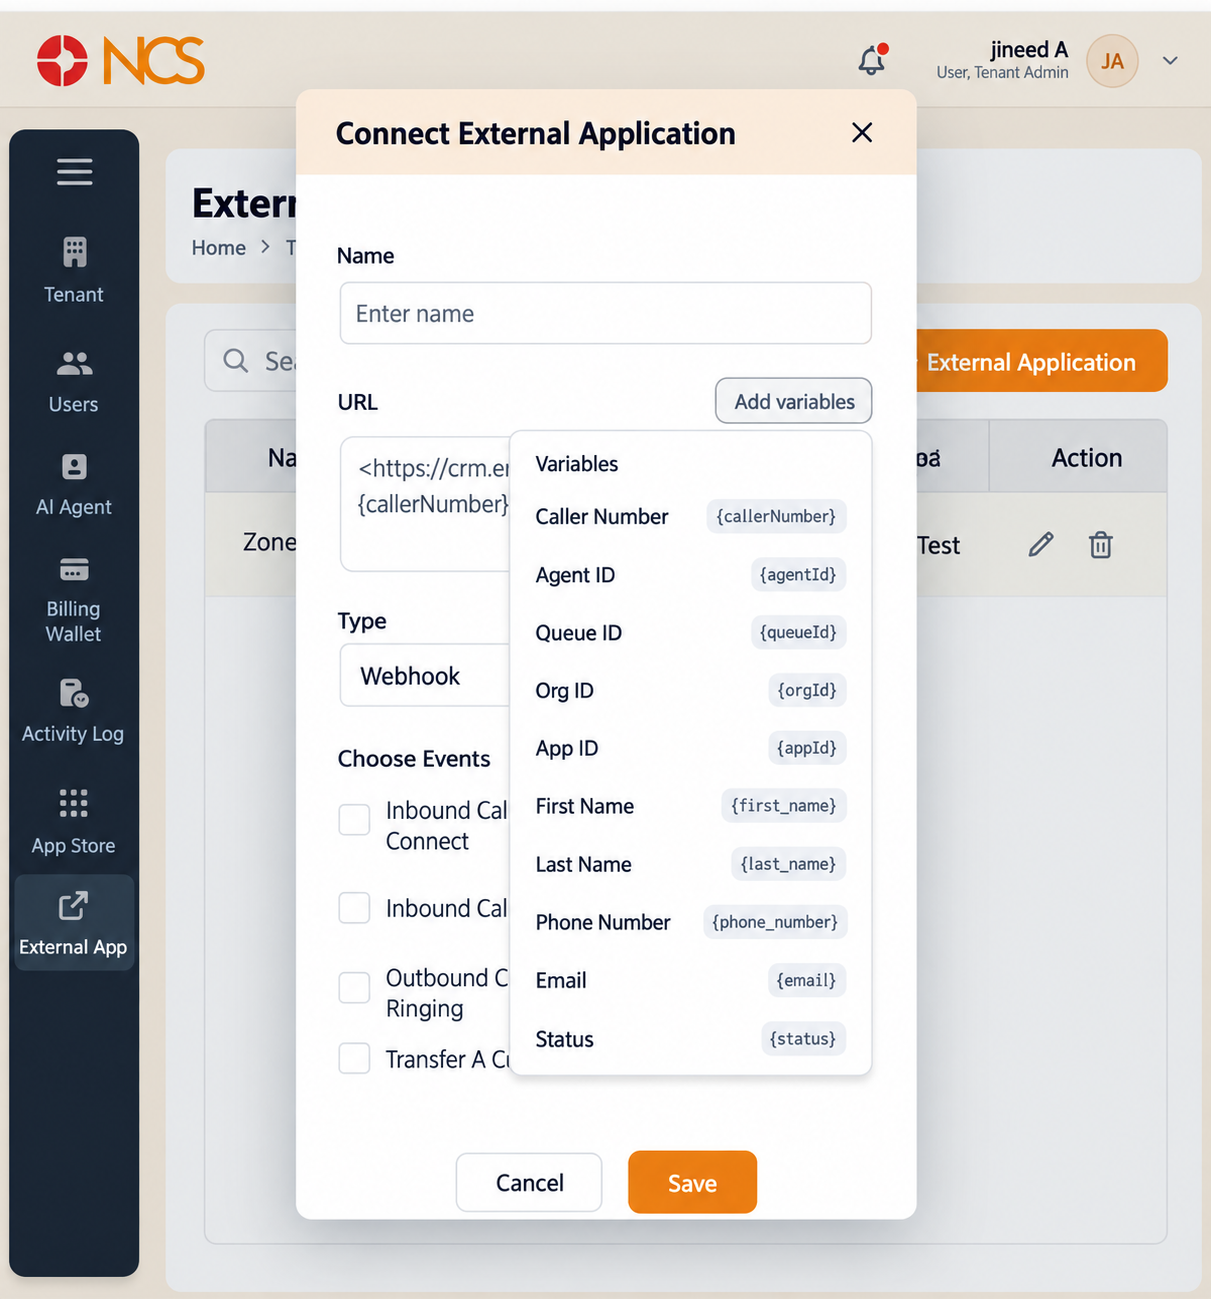
7.3 Insert call data variables into the URL
Variables carry call data to the receiving system inside the URL.
- In the connection form, place the cursor in the URL field where the value belongs.
- Select Add variables.
- Select the variable you need. It is inserted into the URL at that position.
- Repeat for each value the receiving application requires.
- Check the complete URL against the receiving application's documented format before you save.
Available variables, ten in total:
| Variable | Token |
|---|---|
| Caller Number | {callerNumber} |
| Agent ID | {agentId} |
| Queue ID | {queueId} |
| Org ID | {orgId} |
| App ID | {appId} |
| First Name | {first_name} |
| Last Name | {last_name} |
| Phone Number | {phone_number} |
{email} | |
| Status | {status} |
Always insert tokens with Add variables rather than typing them - Every token uses single braces, as shown above. Typing a token by hand risks a spelling or brace error that the form will accept and that then fails silently at call time, because a malformed token is sent to your endpoint as literal text rather than as a value. Add variables inserts the correct form every time.
If you inherit a connection whose URL uses double braces, for example {{phone_number}}, do not copy that pattern into a new connection. Rebuild the URL using Add variables, and raise the existing record with support@ncsapp.com so it can be checked.
Figure key, Add variables picker
- URL field, with the insertion point.
- Add variables control.
- Variable picker panel.
- The ten variables with their tokens: Caller Number
{callerNumber}, Agent ID{agentId}, Queue ID{queueId}, Org ID{orgId}, App ID{appId}, First Name{first_name}, Last Name{last_name}, Phone Number{phone_number}, Email{email}, Status{status}. - The assembled URL showing the inserted token.