Broadcast
BRD 5 Settings
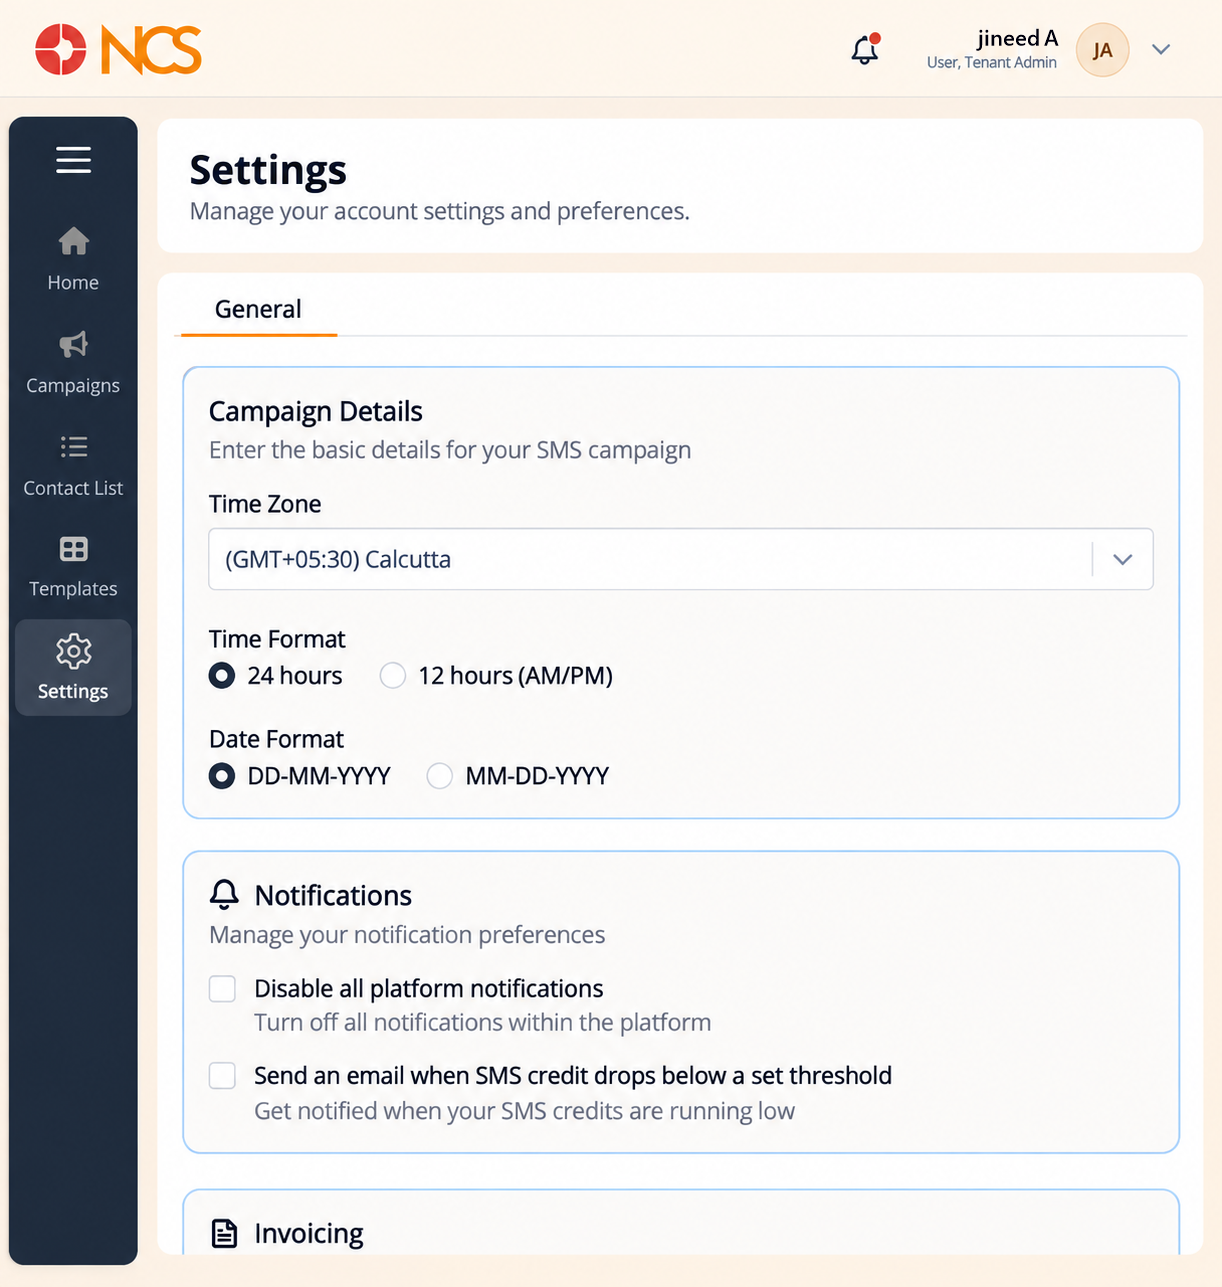
Broadcast > Settings holds the module's own preferences. Set them before you schedule a campaign, because they decide how the times and dates you enter are interpreted.
- Open Broadcast > Settings.
- Select the Time Zone.
- Select the clock format: 24 hours or 12 hours (AM/PM).
- Select the date format: DD-MM-YYYY or MM-DD-YYYY.
- Configure the notification options:
- Disable all platform notifications.
- The low-SMS-credit email option.
- The invoice email on plan renewal.
- Configure temporary support-team access, for troubleshooting only.
- Select Save Changes.
Set the timezone and date format before your first scheduled campaign. Set the timezone and the date format before your first scheduled campaign, not after. A campaign scheduled under MM-DD-YYYY when you meant DD-MM-YYYY can send months early or months late, and the wizard has no way to know which you intended.
Leave the low-SMS-credit email on. It is the warning that a campaign is about to stop part-way through a send. The wallet it draws on is the same one reported in Tenant > Billing Wallet (see 4.1 in the Tenant module draft).
Figure key, Broadcast Settings
- Breadcrumb.
- Left navigation, with Settings selected.
- Time Zone selector.
- Clock format options, 24 hours and 12 hours (AM/PM).
- Date format options, DD-MM-YYYY and MM-DD-YYYY.
- Disable all platform notifications control.
- Low-SMS-credit email control.
- Invoice-on-renewal email control.
- Temporary support-team access control.
- Save Changes button.